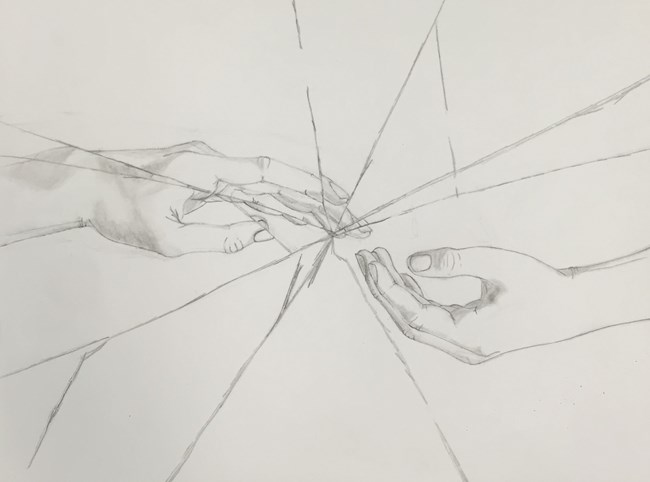
For this particular project, I got my inspiration from an opening of the anime Charlotte which had many unique visual images halfway through it. This included two hands being separated by shattered glass. So I decided to then draw some cracked glass and draw two hands. While making it, I also then decided that I wanted one hand to be distorted by the cracked glass while the other was not, which turned out to become my favorite part as it was very interesting trying to distort the hand through the glass depending on how I saw the glass and what it would do to the hand. Using techniques of shading with a tortillion and a no.4 pencil used in the last project, I was able to replicate the effect of a light coming from behind one hand while the other distorted one was in darkness. I also used pictures of my hands with this same lighting as templates for how I should shade them. With the shading I think I was able to capture a desperate look or a kind of hopeful kind of feeling. Something interesting as well was that, when showed to my friends, people felt differently about the photo depending on the angle. They saw "desperate" when looked as shown in the picture above, but when showed backwards they saw a more "romantic" feeling.
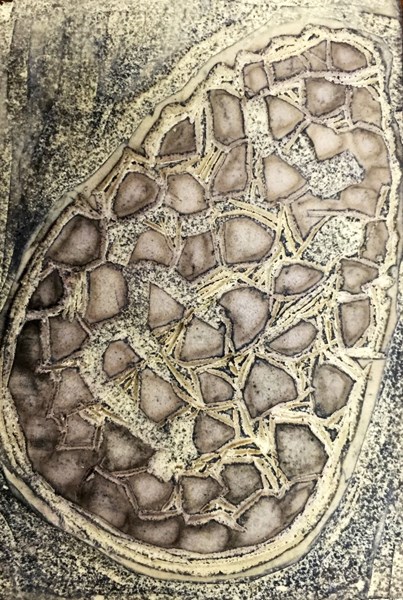
 
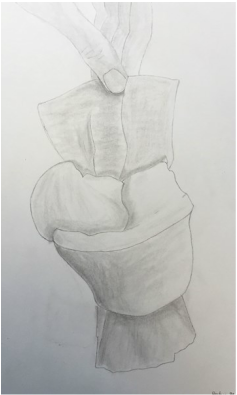
This was another small project for using values, In this particular one we were drawing a foam knot and adding value. I decided to add a hand with value as an extra step for myself.
0 Comments
The picture plane is a mental concept. It is an imaginary transparent plane, like a framed window, always parallel to the artist's eyes. What the artist sees continues off into the distance but the picture plane enables the artist to see the scene as though it were flat - like a photograph. The 3D image is converted 2D on the plane and the artist then copies the image onto the paper. Drawing is copying what you see flattened on the picture plane. (Source:https://millis.itslearning.com/ContentArea/ContentArea.aspx?LocationID=640&LocationType=1) For this project it was necessary to draw your hands with wrinkles in them by folding your hands and copying the picture by putting your hands under an acetate. The obstacle with transferring the 3D hand to a 2D plane though is that the perspective, depth, and shading changes. This all effects what the eye sees and it looks less realistic in a 2D plane due to that. So in reality drawing is just taking something 3D and copying onto a flat 2D picture plane which is an imaginary plane like a window that is always parallel to the artist's eyes to help the artist see a 3D scene in a 2D plane.
A blind contour like the ones above or below are an important step to learning how to draw because when blindly drawing something while having a template image, you have to rely on the R-mode side of the brain to draw the correct picture that you think you may be drawing. While I was drawing this, I knew that it was probably way off what it was supposed to be but I tried to put as much detail in it as possible, and while it did turn out a bit off, it had the basic concept nailed down.
Upside drawing removes the mental conflict that arises when confronted with drawing complicated features. This is because our brain simply does not recognize the features for what they are. In our example, Igor Stravinsky's complicated folded hands become a series of lines and adjacent shapes that can be drawn just as you see them. This is the key to learning how to draw. Allow your own line style to come through (Source: https://millis.itslearning.com/ContentArea/ContentArea.aspx?LocationID=640&LocationType=1) The upside-down man turned out to be Picasso's Igor Stravinsky in the end. At first we did not know what we were drawing and were simply copying a hidden drawing upside-down inch by inch. While copying it was hard not to make symbols out of certain things like the hands or face because I had once seen this picture before. In the end I think that it turned out fairly well though. Throughout it, since I was a bit unsure of what I was drawing at certain points I used a line style that I use for most of my drawings which is a light sketched line until I am sure of the line and then shade it over. Not knowing what it was made the drawing easier though because you could not make symbols of anything and just had to draw lines in general. When you would be drawing hands or legs folded together while knowing what they are you would confront problems of dimension, what they would look like, and how it would translate. So in all this was a good practice to get our R-mode side of the brain running.
The Theory: Betty Edwards, author of Drawing on the Right Side of the Brain, designated the terms L-mode (for the left side of the brain) and R-mode (for the right side of the brain) to describe the different ways of perceiving/interacting with the world: L-mode:
(Source:https://millis.itslearning.com/ContentArea/ContentArea.aspx?LocationID=640&LocationType=1) The L-mode mostly dominates the Language, verbal, sequential, and analytic or logical side of the brain while the R-mode dominates the visual, holistic, and intuitive or non-linear side of the brain. For most people only one side of the brain can be focused on at one time and one side of the brain usually dominated the persons brain for a certain time making them more logical or artistic. The reason why the R-mode side of the brain is more preferred though is because it controls the most artistic side of the brain as it is the visual side. Due to this though, if someone is talking in the background or there is background noise, some may not be able to complete an artistic project like the vase-face because their L-mode will be active for the sounds and the R-mode will be active for the art which will both conflict. For me though, during this I was able to drown out most of the background sounds due to my experience with drawing without paying attention to background noise much. So both the vase-face's with and without background noises did not differ that much except for the amount of time given to finish each.
This project was one of the first projects performed in the art class and composed of carving a linoleum block with a carving tool (v-tool/u-tool). For the block I was inspired by a pinecone as it reminded me of the fall season along with leaves and pumpkins. This pinecone block was the first one I was able to do but it wasn't my favorite as it came out poorly and took too much time for me to continue onto the other ones or actually do a print. So if I were to do this project again I would probably just try a whole new outlook together and try and take less time on the actual carving process. I did learn some new concepts though as I outlined the template, carved the block with a u or v tool, and then used the brayer and spread ink that would be used to stamp prints.
Its a new school year and I am now moving into Fundamentals of Studio Art I. In this class I will be moving from photography to art and using brushes, pencils, and more instead of my camera. I hope you enjoy the artwork created during the 2015-2016 school year.
|
AuthorRegular High School kid doing some art and photo projects for my Digital Photography class & Art Studio Class. Archives
June 2016
Categories |