Using clay, I was able to create many different things including my vase/cup and bowl. In order to make these 2 slab potteries, you have to first obtain a slab of clay that has a good amount of elasticity, or isn't dry, and if it is dry then water has to be added in order to increase the elasticity/plasticity to be able to mold the clay into a shape that you would like for the object you are creating or texture that you are trying to make. The texture could be added through carving with different tools or rolling the clay out on texture templates while suitably in a leather hard stage. If left out for a little while with maybe a little covering, the clay would reach a leather hard stage in which it would be no longer elastic but still retain some moisture for molding. Water could be added to this leather hard stage and even to the greenware stage in order to return the stages of elasticity. To get the greenware stage, the clay would just have to be left out to dry without covering until the clay turns from its gray color to a white color or from a soft texture to a bone dry or brittle/firm texture. The greenware pottery would then be put in the kiln in order for the clay to reach high temperatures and become bisque ware which would make the shape of the clay permanent and not allow it to become elastic through water again. Glaze of any coloring could then be added, allowed to dry, and put in the kiln to let it sink into the bisque in order to give the pottery its own uniqueness. Using these steps I made both the vase/cup and the bowl and learned many techniques on how to texture the clay as well as the many different stages of clay.
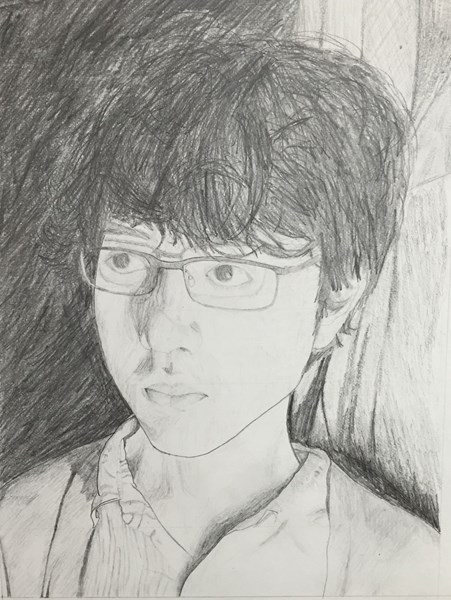 Throughout making this, I learned many things about portraits as well as some things about shading. Making the portrait was a very good a fun experience that increased my skill as I did not know about certain methods displayed in this project before. The shading was a bit difficult, especially in the hair and background area, but was bearable as I have a lot of experience in shading and suing graphite without smudging. But the concept that I most learned from this experience that will help me is the use of the grid boxes on both the reference picture and the drawing that guided me on where to draw everything similar to the method that the famous artist Chuck Close does. In the end, this artwork did surprise me that it was able to turn out so well but if done again I would like to retry the shading in the hair and background areas.
|
AuthorRegular High School kid doing some art and photo projects for my Digital Photography class & Art Studio Class. Archives
June 2016
Categories |
 RSS Feed
